Monday, February 28, 2011

Soft Pretzels

I love soft pretzels.  In college, my friends and I used to go to a local farmers  market on weekends.  Every Saturday there was a booth run by 3 mennonite women who made the best soft pretzels!  So when I saw  this  Soft Pretzel Mix at Crate & Barrel, I had to get it.


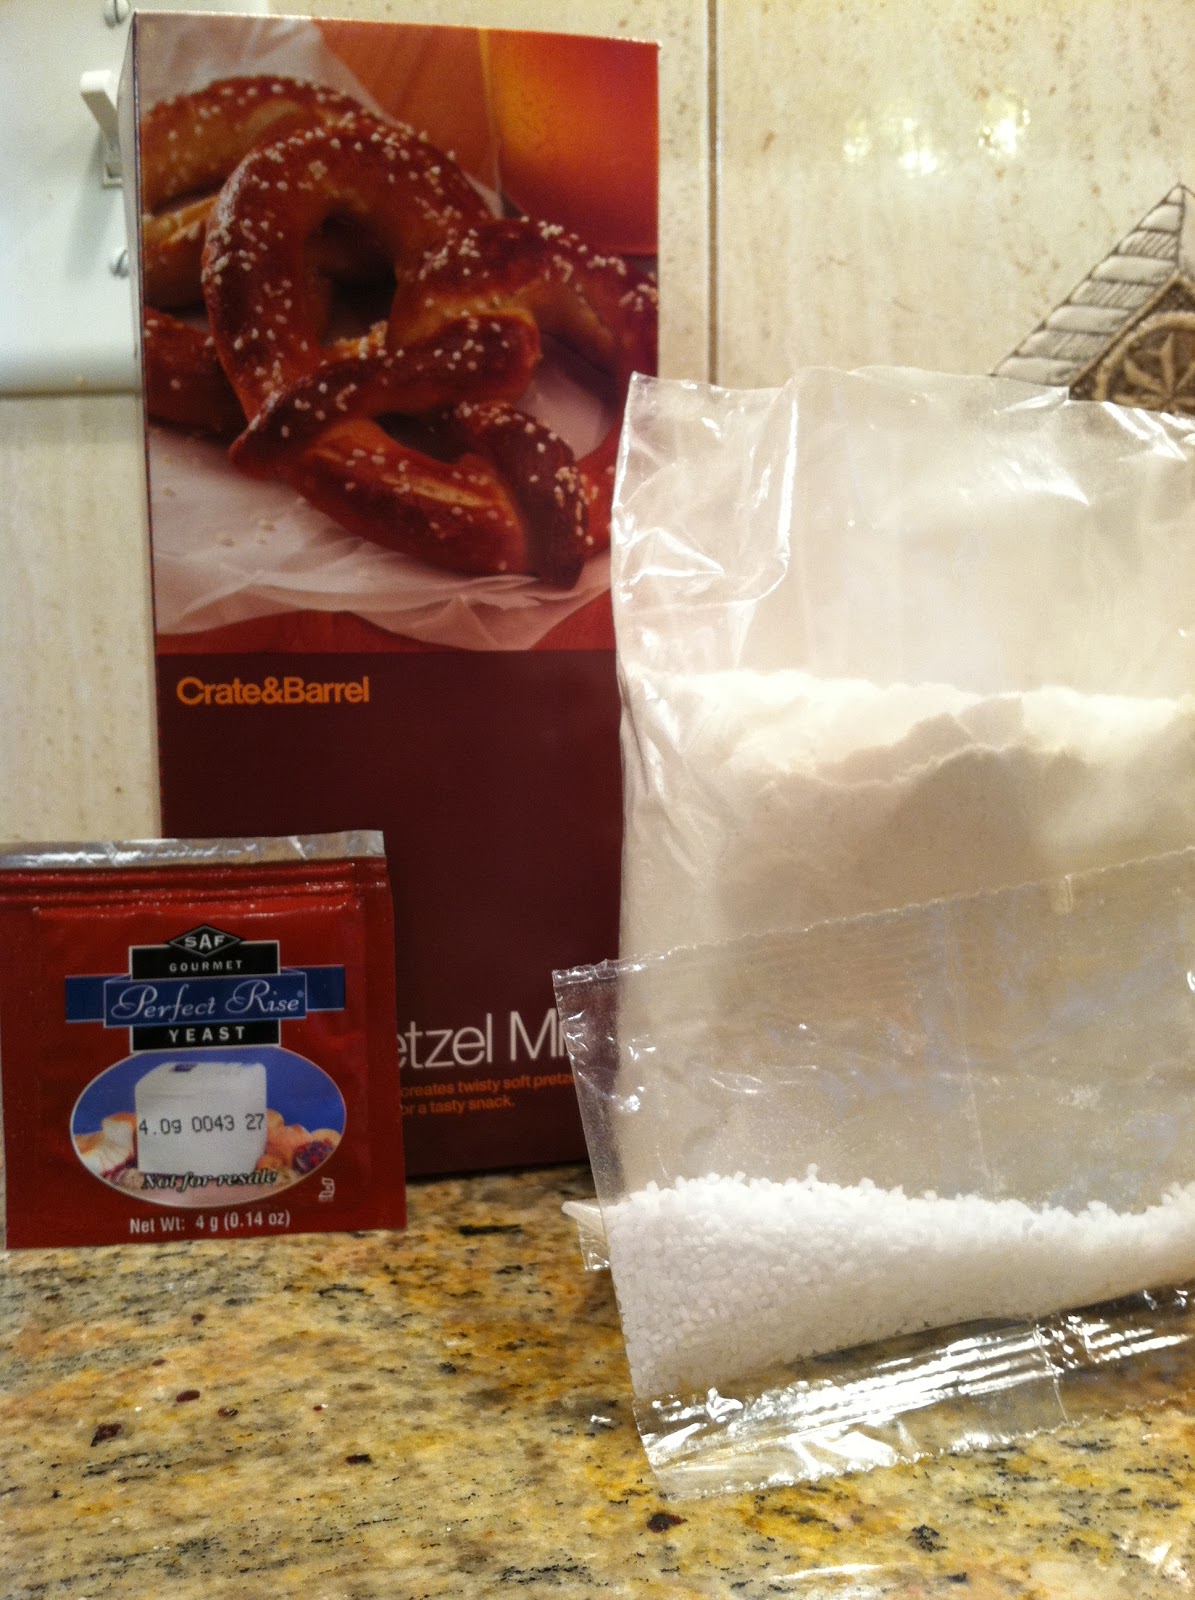
It was pretty easy overall.  The kit included pretzel mix, pretzel salt and yeast.  After melting butter and combining it with water, I added the yeast and stirred until dissolved.  Then I added the pretzel mix and combined it. 

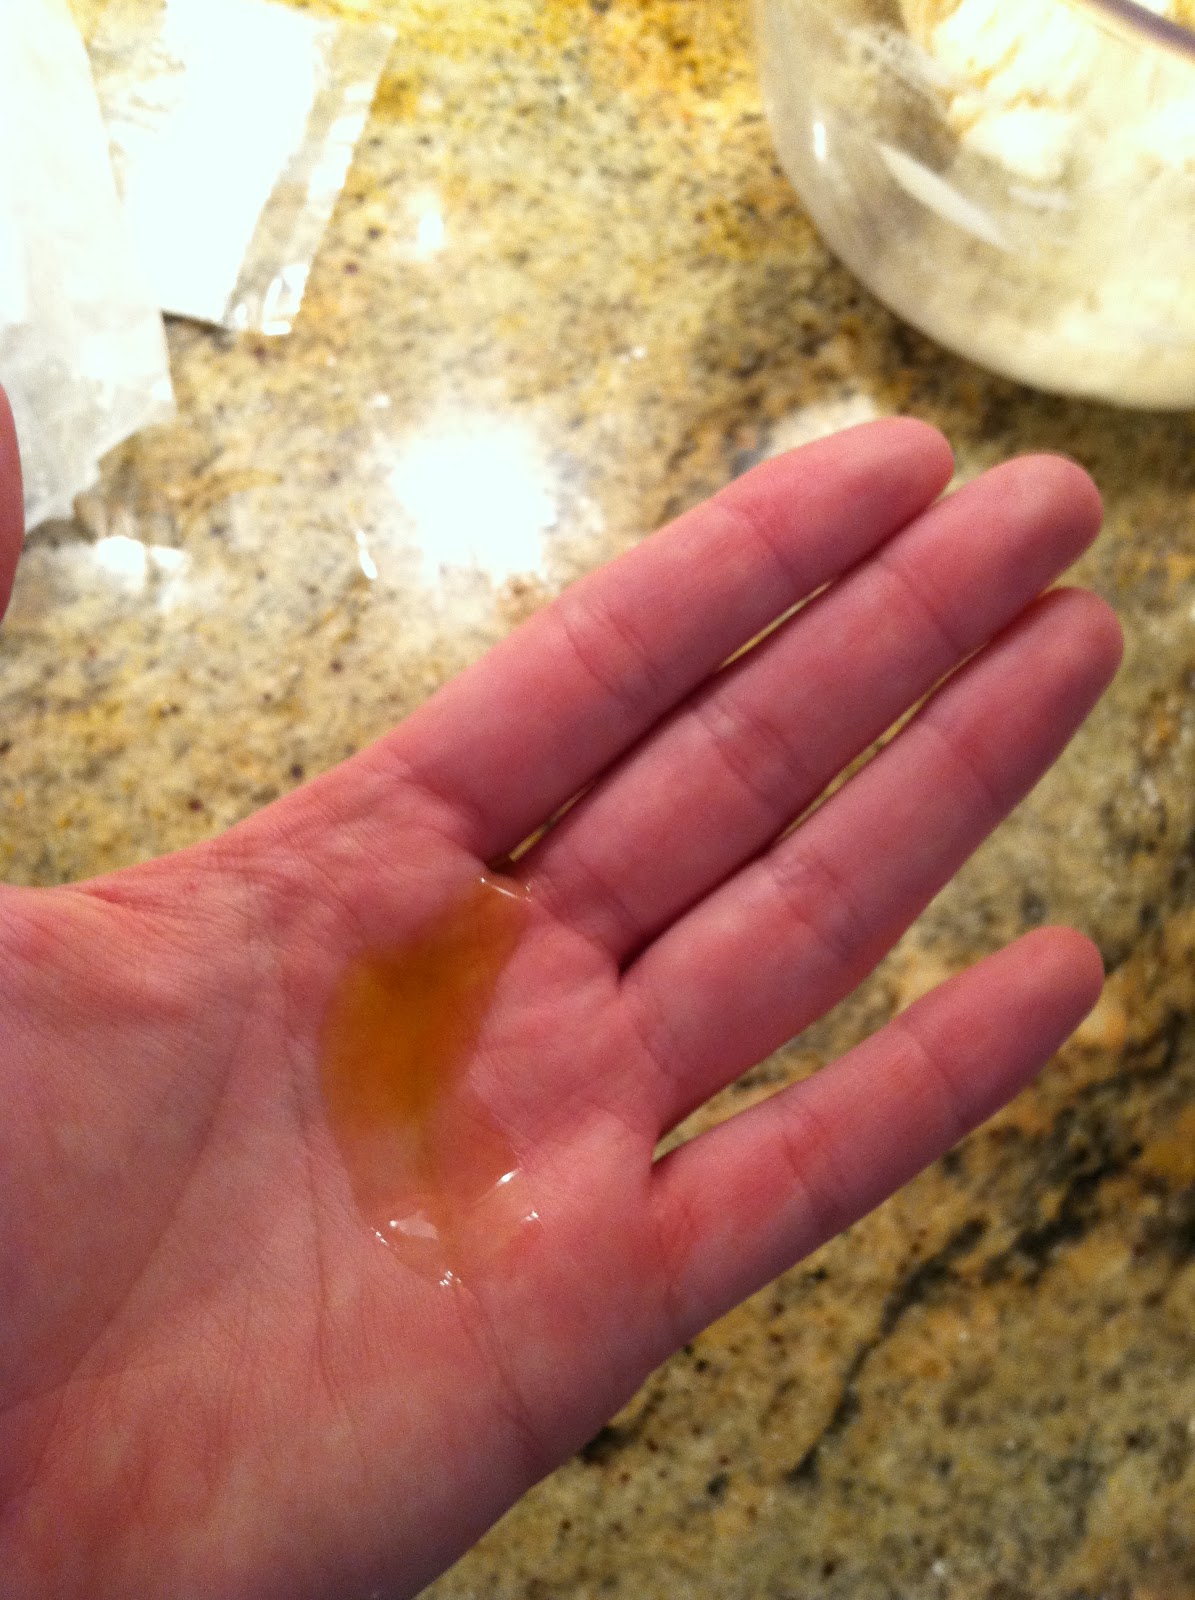
Next came the fun part - kneading the dough!  The instructions suggested lightly oiling your hands.

"What kind of oil?"  I wondered.  "Olive Oil?  Sure!"
 

So after oiling up my hands, I kneaded the dough for three minutes.  Then I set it in a bowl and covered it with a towel, and left it for a half hour to rise.

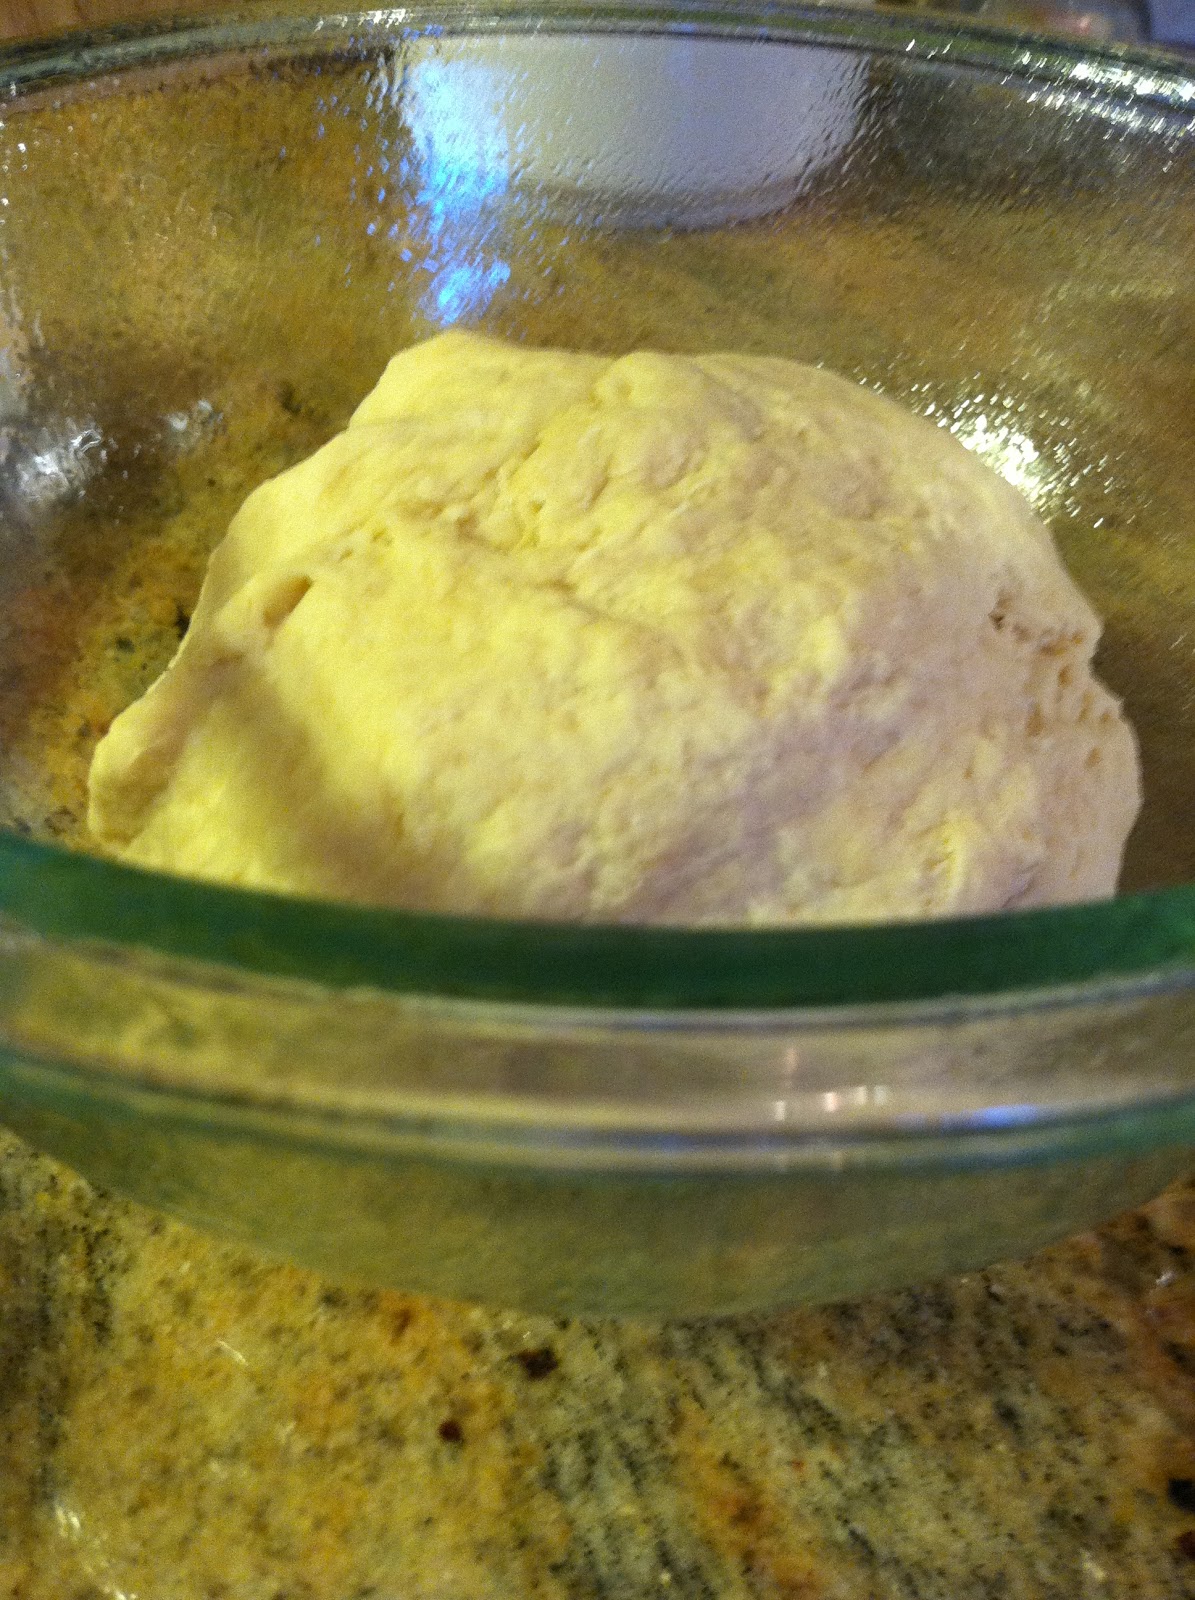
In retrospect, I think they wanted me to use a more airtight cover.  Oops - that probably explains why the dough didn't rise very much!

Not much bigger.

After a half hour, I pre-heated the oven to 450 and set about rolling out the pretzels.  I divided the dough into five sections and rolled it into 24-inch long sections.  This.  Took.  Awhile.  The ropes of dough kept falling apart, and it took forever to get them long enough.  I have a newfound respect for the pretzel-makers at Auntie Anne's!


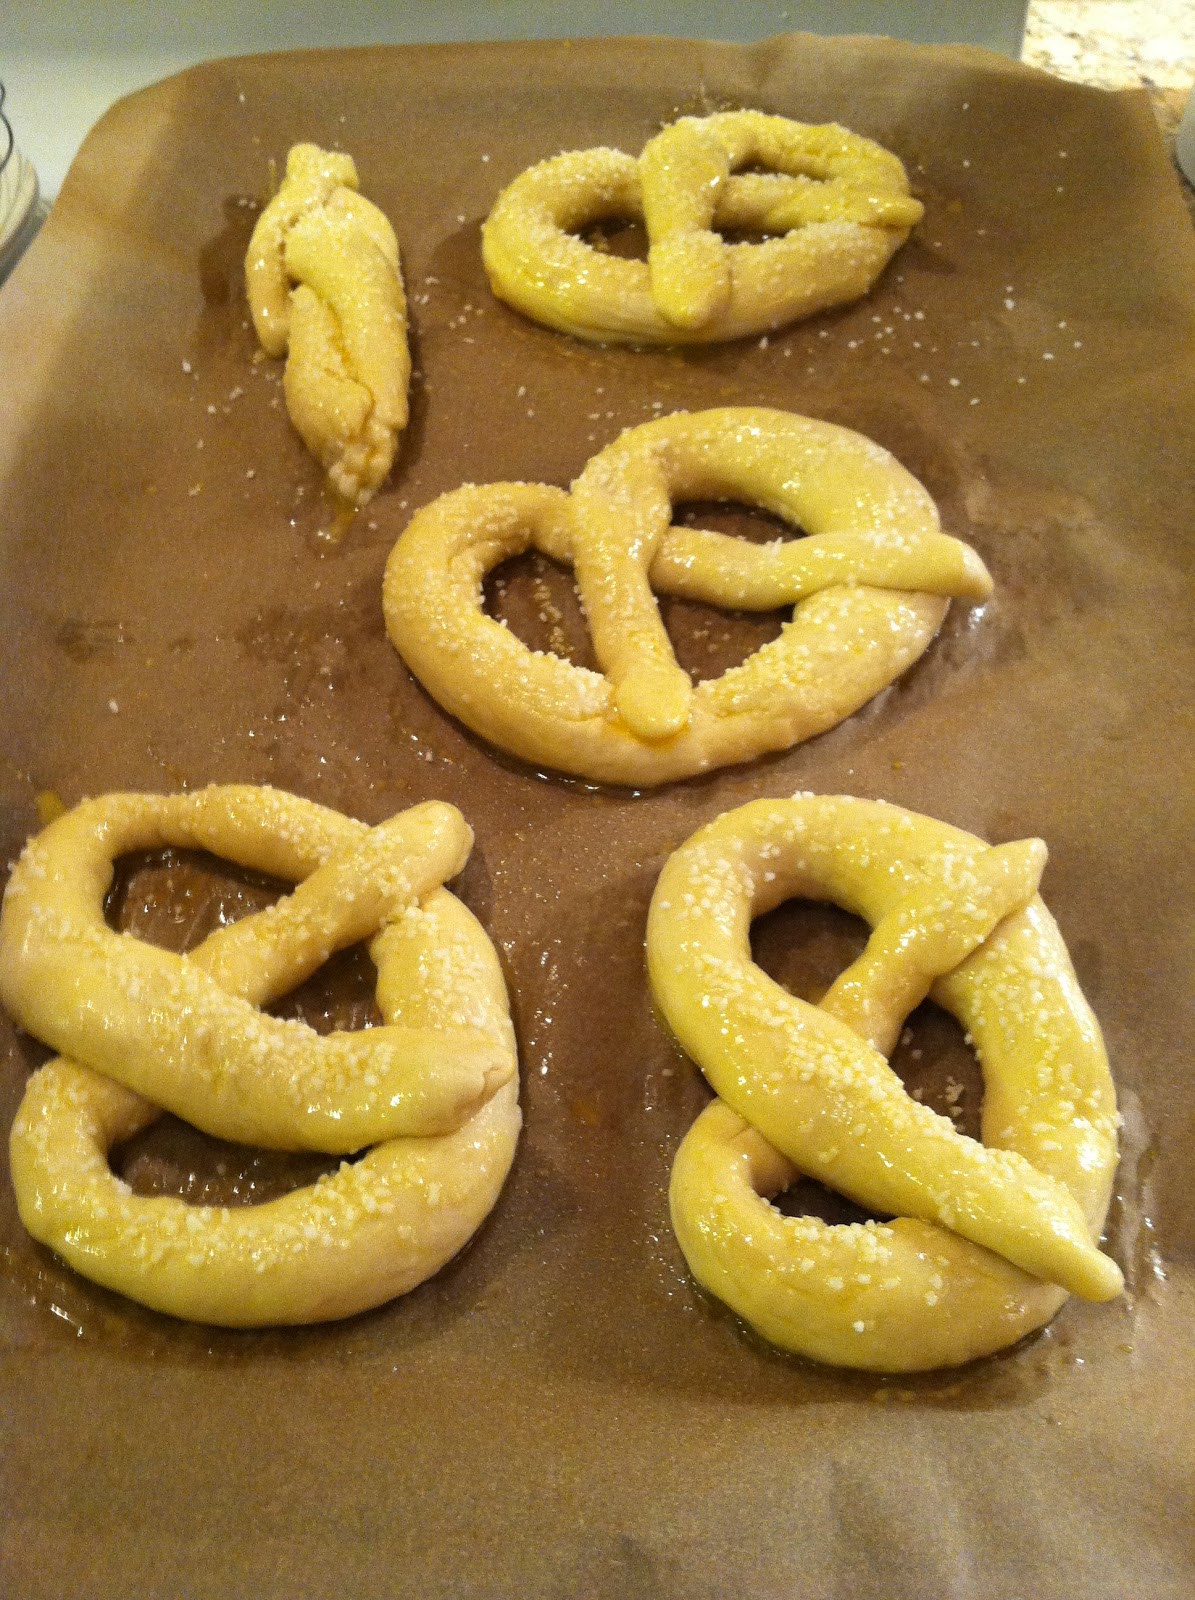
Anyway, eventually I ended up with four conventional pretzels and one twisty-log-pretzel.  I used a "baking soda bath" to make them extra dark - basically I boiled a pot of water and baking soda and dipped each pretzel in it for 30 seconds. 

splish-splash pretzel's taking a bath...

Then I brushed each pretzel with egg yolk...


...and sprinkled them with salt. 


Then it was  time to bake!

bon voyage, little pretzels!

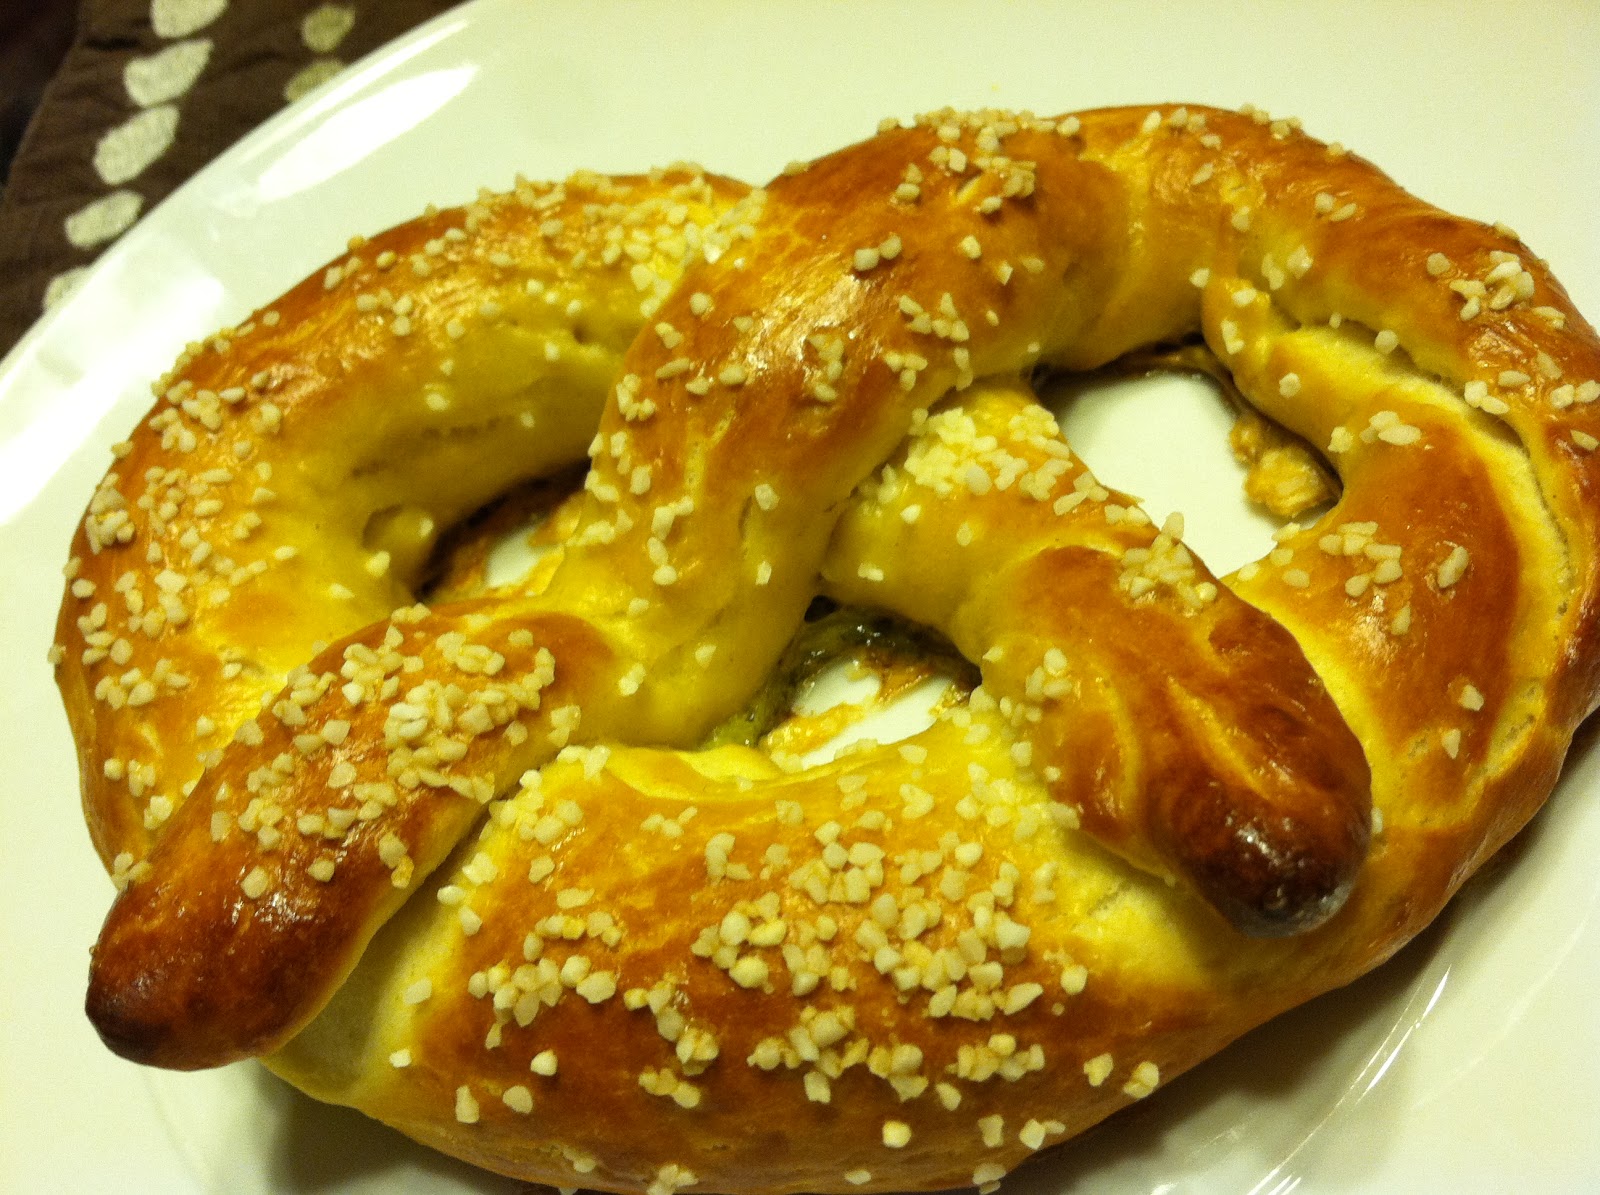
After 12 minutes, the pretzels were a nice golden brown.  And boy, were they delicious!  Really soft and not too salty.  I ate them plain and they were plenty flavorful!


Next time, I think I'd like to try making these from scratch and experiment with other flavors - like cinnamon sugar and jalapeno.  Hmm maybe I need to create a baking "to-do"  list....


Thursday, February 24, 2011

It's that time of year...

Girl Scout Cookie Time!  Like most of America, my absolute favorite is the Thin Mint (don't worry Peanut Butter Patties, I love you too).  So when the boxes I ordered from my co-worker's daughter arrived last Friday, I was very excited!

I decided to try and make some thin mint cupcakes.  I couldn't find a recipe that I really liked/ had the ingredients on hand for, so I decided to (gulp) try making up my own!  This was a first for me, as I usually stay pretty close to a recipe, especially with something I haven't tried before.

First, I crushed up a sleeve of Thin Mints in my handy-dandy food processor.

(don't worry little cookies, I have better things in store for you!)

I processed these until they were just teensy little crumbs, then combined them with cocoa powder and some hot chocolate.

Yep, hot chocolate!  I whisked this into the cocoa powder and crushed thin mints, then put it into the fridge to cool.

In the meantime, I mixed up some bread flour, sugar, salt and baking powder and set that aside.

Once the chocolate mixture cooled (approx 20 minutes), I took it out and added some vegetable oil, eggs, vanilla and white vinegar.  I whisked it all together then mixed in the dry ingredients.  At this point, the cake part was done and ready to bake! 

I popped these in the oven and while they were baking, I whipped up a 'Thin Mint Buttercream' frosting.  I mixed together butter, heavy cream, the rest of the crushed thin mints and vanilla (recipes below).


Once the cupcakes cooled, I decided to use this Wilton Decorating Tool for the frosting.


Here's the recipe if you'd like to try it - I know I froze the other sleeve of cookies to make these again before next year!  You could also substitute in other cookies - grasshoppers, oreos, etc.

I was really happy with how my first foray into straying from recipes went - the cake was very moist, and the frosting was light and not too sweet.  My only regret is not baking more than 12 ;)


The Sweetest Times' Thin Mint Cupcakes

Ingredients:
2/3c chopped Thin Mints
1/3c cocoa powder
3/4c hot chocolate
3/4c bread flour
1c sugar
1/2tsp salt
1/2tsp baking powder
6tbsp vegetable oil
2 eggs
5tsp vanilla extract
2tsp white vinegar
1 stick unsalted butter, softened
1c heavy cream, room temperature
3c confectionary sugar

Preheat oven to 350 and line a muffin pan with 12 baking cups.

Ground up one sleeve of Thin Mints in a food processor.

In a large bowl, combine 1/3C of Thin Mints with 1/3C Cocoa Powder and 3/4C of hot cocoa.
Whisk together and set in fridge to cool completely (approximately 20 minutes).

In a small bowl, combine 3/4c bread flour, 1c sugar, 1/2tsp salt and 1/2tsp baking powder.
Whisk together and set aside.

Once the chocolate mixture has cooled, remove from the fridge and add 6tbsp vegetable oil, 2 large eggs, 2 tsp vanilla extract and 2tsp white vinegar.  Once this is combined, slowly add in the dry ingredients.

Pour into muffin pan and bake at 350 for 15 minutes.

Thin Mint Frosting:
Cream 1 stick unsalted butter (softened) and 1c heavy whipping cream (room temperature).  Once mixed, add 1/3c of Thin Mints and 3 tsp vanilla extract.  Slowly add in the powdered sugar (amount may vary depending on desired thickness).

Spread onto cooled cupcakes and enjoy!

Monday, February 21, 2011

Not-Quite-Perfect Pot Roast

Believe it or not, I actually use my kitchen for more than just cupcakes, cookies, whoopies, cakes, breads… where was I?  Oh yes, sometimes I actually cook “real” food – with nutritional value! – in my kitchen.  And sometimes, when I conquer some recipe that I’ve struggled with or been afraid to try, I’ll share it here!

Last week we had some warm weather in Boston, which was great, but this being New England and it only being February, it got cold again quickly.  So I was in the mood for a hearty meal – and had recently seen this recipe for the “Perfect Pot Roast” on Pioneer Woman Cooks – one of my favorite sites for all things kitchen-related.  I had also recently purchased a dutch oven and was excited to use it!


So, I went to the store and purchased 3.5LBS of chuck roast and some carrots, fresh thyme and organic beef broth. 

I pre-heated the oven to 275 and salted and peppered the roast.  I wasn’t sure exactly what PW does, but I just poured some sea salt and ground pepper on the roast and rubbed it in.


And rinsed and chopped up the carrots.


Then I heated up the dutch oven on the stove and added some olive oil.  Warning: it heated up WAY faster than I thought, and the oil started smoking almost immediately.  FAIL.  So, I had to do that part again, and didn’t wait so long to add the oil – it worked much better the 2nd time.  I browned the carrots then took them out and browned each side of the roast (there were 3 sides, for the record) for about 45-60 seconds per side and removed it.  Then I poured some cabernet sauvignon (approx 1 cup) into the dutch oven to “de-glaze” it.  Not sure what that meant, exactly, but I basically just poured the red wine in and swished a whisk around until the remnants of beef came off the bottom.


I turned off the burner and put the roast back in and added 1 cup of beef broth and a little bit more wine.  Then I added the carrots and fresh thyme.  The recipe called for rosemary, but I’m not a big fan of rosemary so I used herbes de provence instead.  Side note: I had no idea what herbes de provence were, but saw this cute little pot of them at the Williams + Sonoma outlet when I was visiting Wrentham last summer.  I use them on everything!  Vegetables, meat, etc – they have a great flavor and go with almost everything.


Anyway.  Herbes de Provence – try them.  At this point I was ready to “roast”!  I put the pot roast in the over for 3 hours and waited.


And waited.

And waited.

When there were ~10 minutes left, I put some frozen garlic flatbread into the oven to heat up – I think mashed potatoes would have been great with the roast and carrots, but it was pretty late at this point and I didn’t want to eat some heavy, creamy potatoes. 


It came out great, for a first time try, in my opinon!  The meat could have probably been a bit rarer, and I think the sauce could have been more flavorful.  But, I conquered my fear of cooking a huge chunk of meat, and next time will experiment a bit more with seasoning and ingredients.


Bon appétit!

Wednesday, February 16, 2011

Whoopie!

Sur La Table recently had a big winter bakeware sale and I ordered a Whoopie Pie Pan.  It arrived this weekend and I was so excited to use it!  Since Valentine's Day just passed, I decided to try out Red Velvet Whoopie Pies.  I adapted this recipe.

First I whisked together the dry ingredients - 2c flour, 2 1/2 tbsp cocoa powder, 1/2 tsp baking powder and a pinch of salt.

I set that aside and creamed 1 stick of butter with 1c brown sugar then beat in an egg and 2tsp vanilla.

I didn't have buttermilk, so I mixed some lemon juice with 1/2 cup of regular milk and waited for it to curdle (sounds gross, but it works!).  I added this and the dry ingredients into the wet mixture, then mixed in about 2 tbsp of red food coloring.

It made exactly 12 cakes - or enough for 6 Whoopies.  At least, enough for 6 whoopies the way I poured them....

These took approx 12 minutes to bake.  While they were in the oven, I made vanilla cream cheese frosting for the filling.  I combined 1 stick of butter with one package of cream cheese, then added in confectioners' sugar (approx 2-3 cups, I was measuring based on consistency) and 2 tbsp vanilla extract.

When the cakes were done, they were HUGE.  Way too big!  I guess I poured too much batter into the molds; I filled the molds to the top, and probably should have only filled them 1/2 - 3/4 full.  Oops :)

Like I said, BIG whoopies!  Once they cooled, I added a dollop of the cream cheese filling to six cakes, and pressed down with the others to make sandwiches.  I made about twice as much frosting as I needed.  Maybe these should be called WHOOPSIE Pies?

Friday, February 11, 2011

Red Velvet Cupcakes

With Valentine's Day coming up, I wanted to make something festive (and use some pink cupcake wrappers I've had sitting around).  Now I normally try to bake everything from scratch, but my mom had picked me up an adorable Red Velvet Cupcake Kit and I decided to use it (plus, I was in a bit of a hurry!).


Isn't it cute?  And it was so much simpler than baking from scratch... all you needed was 3 ingredients for the cake:  Oil, Water and 1 egg.


See?  Easy!


And boy was it RED!  The cupcakes took about 25 minutes to bake, so while they were in the oven I made the cream cheese frosting - which was super easy, the kit had a frosting pack and you just needed to add butter, milk and cream cheese.  It was a little thin (with a VERY strong cream cheese flavor), so I added some confectionary sugar to thicken it and make it a little sweeter.


Once the cakes had cooled, I got to decorating.  Nothing fancy - I just added some pink sanding sugar to the tops and that was it.  I would have liked to do more decorating, but as I said - I was in a hurry.

Overall, these were pretty good, especially coming from a mix.  But they were no match for homemade cupcakes.  Next time, I'd probably use a mix again if I was in a hurry, but I'd make the frosting from scratch.


Happy Valentine's Day!

Friday, February 4, 2011

Sweetest Visits: Kickass Cupcakes

I was recently at Kickass Cupcakes in Somerville and decided to add a quick recap of my visit.  Now, I've been to Kickass before and would probably visit a lot more if it was closer to where I live/work.

I should mention I have a close friend who works at Kickass, so I've had the opportunity to try lots of the flavors she brings home.  For example, their "basic" flavors - vanilla, chocolate, red velvet - are to die for.  They use all-natural coloring and ingredients, so the cupcakes aren't as vibrant in appearance as at some other shops, but they're delicious.  The cakes that I've tried are always moist, with a good cake-to-frosting ratio.


One of my favorites is their take on the 'Funfetti' cupcake - a vanilla cupcake with sprinkles baked in, and a vanilla buttercream frosting.  Simple, but delicious! 

This visit, I tried something new: their DEEP-FRIED CUPCAKE.  Yes, you read that correctly.  And yes, it was as awesome as it sounds.

Image courtest of Elizabeth at Free Food Boston

There it is!  So it's a vanilla cupcake, deep fried, then covered in chocolate fudge and homemade whipped cream.  Oh my!  I shared it with a friend, as it is a LOT of sweetness, but it was delicious.  It reminded me of a very dense funnel cake.  I can only imagine how good it would be with some fruit toppings as well.


Yep!  Like I said - awesome.  I really like Kickass Cupcakes - they have a unique spin on a lot of flavors, and try to use all natural and seasonal ingredients, which is great.  There's also a dairy bar attached, which I haven't tried yet... and they're located next to When Pigs Fly Bakery, so you can overdose on carbs without having to walk more than 20 feet!  Genius!


*Note: I forgot my camera, so all images are from the Kickass Cupcake website or Google images. 

The Sweetest Times is not paid or reimbursed by the restaurant for a positive or negative review. The reviews are strictly for educational purposes only. A bad review does not mean that the restaurant is a bad restaurant. We do not hold back the negative reviews, all reviews are posted upon validation.